Creating custom inflatables is a fascinating process. It starts with an idea and ends with a fun and functional product. In this blog post, we will walk you through the steps of making custom inflatables. We’ll keep the language simple and easy to understand. Let’s dive in!
Step 1: The Idea
Every custom inflatable begins with an idea. It could be a character, a logo, or any shape you can imagine. This idea often comes from a client who needs something unique. Finding out what the client wants is the first thing to do.
Step 2: Sketching the Design
Once the idea is clear, the next step is to sketch the design. This sketch is a rough drawing of what the inflatable will look like. Designers use simple tools to create this sketch. It helps in visualising the final product.
Step 3: Creating the Blueprint
After the sketch is approved, designers create a detailed blueprint. This blueprint includes all the measurements and details of the inflatable. It acts as a guide for the entire production process. The blueprint ensures that everyone involved knows what to do.
Step 4: Choosing the Materials
Materials are crucial in making custom inflatables. One of the most prevalent materials is polyvinyl chloride or PVC. It is strong, flexible, and easy to work with. The material must be chosen carefully to ensure durability and safety. The colour and texture of the material are also selected at this stage.
Step 5: Cutting the Material
With the blueprint and materials ready, it’s time to cut the material. This step requires precision. The material is cut into different pieces according to the blueprint, and special tools ensure the cuts are accurate.
Step 6: Printing the Design
If the inflatable has any artwork or logos, they are printed next. Printing is done using large printers that can handle the material. The design is carefully aligned to ensure it looks perfect when the inflatable is assembled.
Step 7: Sewing and Sealing
After printing, the pieces of material are sewn or sealed together. Sewing is done using strong threads and heavy-duty sewing machines. Sealing is done using heat or adhesives. This step brings the inflatable to life. It starts to take shape and look like the final product.
Step 8: Adding Details
Next, details like zippers, Velcro, and attachments are added. These details make the inflatable functional. For example, a zipper might be added to allow for easy inflation and deflation, and Velcro might be used to attach different parts of the inflatable.
Step 9: Testing
Before the inflatable is finished, it needs to be tested. Testing ensures that it is safe and works properly. The inflatable is filled with air, and every seam is checked for leaks. It is also checked for stability and durability.
Step 10: Quality Check
A final quality check is done to make sure everything is perfect. Any small issues are fixed. The inflatable is cleaned and prepared for delivery. This step ensures that the client receives a high-quality product.
Step 11: Packaging and Delivery
Once the quality check is complete, the inflatable is packaged. The packaging protects the inflatable during transport. It is then delivered to the client. Depending on the size of the inflatable, delivery can be by mail or in person.
Step 12: Client Review
The last step is the client review. The client checks the inflatable to make sure it meets their expectations. If everything is good, the process is complete. If there are any issues, they are addressed promptly.
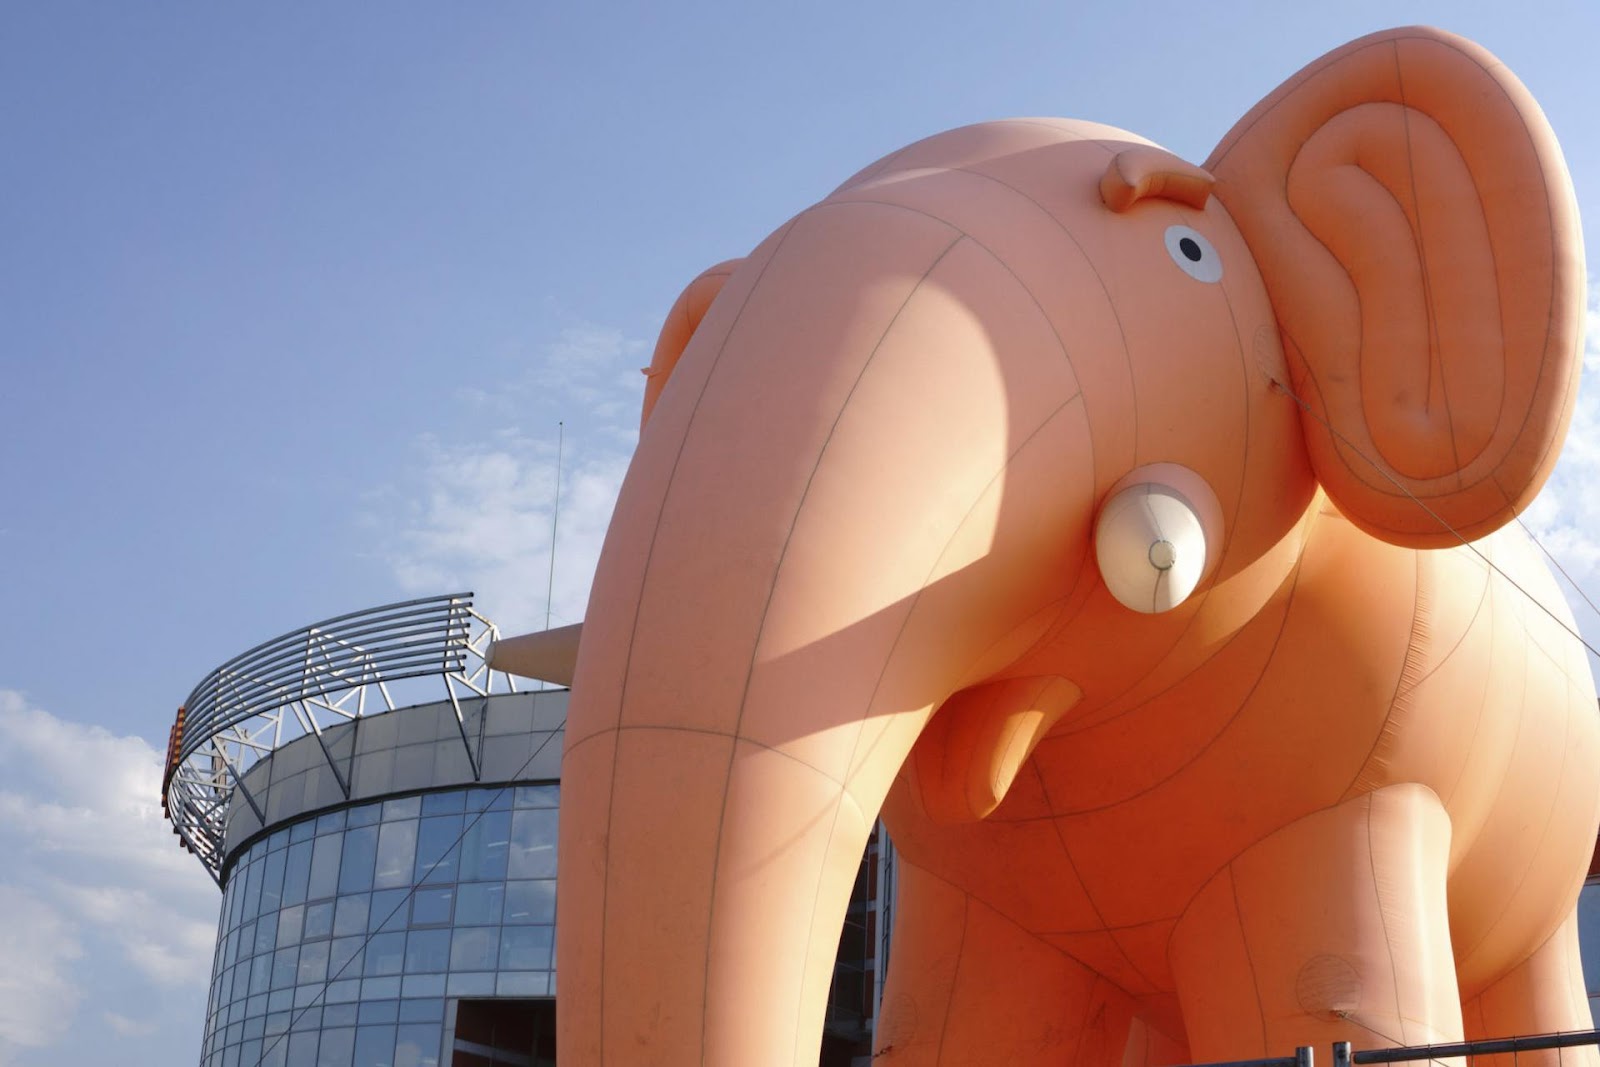
Benefits of Custom Inflatables
Custom inflatables offer numerous benefits. They are versatile, eye-catching, and can be used for various purposes. Here are some advantages of choosing custom inflatables:
Versatility
Custom inflatables can be made in any shape or size, making them perfect for different events and promotions. Whether it’s a giant balloon for a parade or a small inflatable for a trade show, the possibilities are endless.
Attention-Grabbing
Inflatables are hard to miss. Their large size and unique shapes attract attention. This makes them ideal for advertising and promotional activities. They can easily draw a crowd and create buzz.
Cost-Effective
Compared to other forms of advertising, inflatables are cost-effective. The total cost can be decreased due to their reusability. Plus, when not in use, you can simply deflate them and store them.
Easy Setup
Setting up custom inflatables is quick and easy. They can be inflated in a matter of minutes. This makes them convenient for events where time is limited. In addition, they are not heavy and can be moved with ease.
Durability
Custom inflatables are made from durable materials. This ensures that they can withstand different weather conditions and rough handling. When cared for correctly, they have a long lifespan.
Conclusion
Creating custom inflatables is a detailed process that requires creativity, precision, and teamwork. Every stage, from brainstorming to completing the project, is significant. This process ensures that the inflatable is unique, functional, and high-quality.